
The Friday Project Files is a fun feature where each Friday throughout
2013 I share a weekend project with a tutorial that you might like to
try over the weekend! There is no guarantee that the projects were my
idea originally, but I share my take on them! You can read more about the FPF and see other FPF projects here.
.JPG)
I am very proud of myself for cleaning up my bedroom and revamping it into a studio/sleep space after the family becoming fed up with having my projects all around the living room and dining room. I know, it wasn't very good! But I didn't have anywhere to do my projects... and now I do! I'll share pics soon but in the meantime I'm working on decorating it. I had already started an inspiration wall but I knew I needed something else. That's when I thought of a cute garland. This fabric flag bunting is the perfect addition to any space!

For this project you will need:
- At least 4 different THICK fabrics (thin fabrics are horrible to work with)
- Fabric scissors (or any scissors that will cut fabric)
- String/ribbon (I used thin, stiff, gold ribbon)
- Craft glue (that works on fabrics)
- Paintbrush (for glue)
- A sewing machine and thread or needle and thread (optional)
.JPG)
My strips were 18cm x 5cm, but depending on how big you would like your flags, measure accordingly. For a 3m long garland, I suggest you tear around 26 strips. For a frayed look, tearing is an easy option but if you would like straight edges, you can easily cut your strips up too.
.JPG)
.JPG)
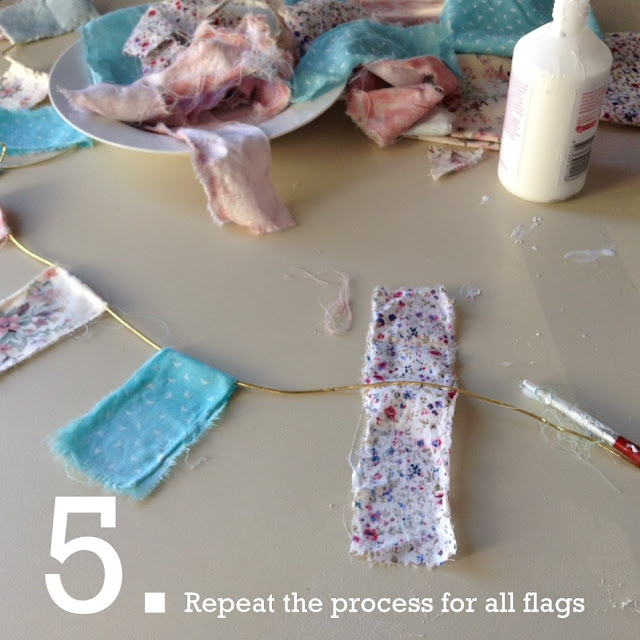

This step is completely optional and only necessary if the glue didn't keep the flags in place.
.JPG)
.JPG)
-001.JPG)

If you do this project too, you can share a photo on my Facebook page, on Instagram with the hashtag #fridayprojectfiles, or through a comment on this post and you can be included in the FFF Project Page where there will be a collection of all the projects over the year.
Be sure to come back next week as I share a really easy decorative tape tutorial!
Have a great week! (I'll be holidaying by the beach, but don't worry, I'll still keep the posts coming!)
Wow~ I think this is easy enough for me to give it a try! I don't think I would sew just glue... Thanks for the tutorial! now I need fabric grrrrrr
ReplyDeleteYAY! If you do try the project I would really love to see pictures! I hope you have a fantastic weekend..! S x
DeleteWow so cute, this would look adorable in my girls' room :o)
ReplyDeleteThanks Jen! I'm sure it would look great in your girls' room! The good thing is you can change the fabric patterns/colours to suit pretty much any space! Have a good weekend... S :)
Delete